How to Manage & View Access on a Facebook Page
📌 Step 1: Open Facebook Page Settings
- Go to Facebook (www.facebook.com).
- Click on your profile picture in the top right.
- Select “See all profiles” and choose the Page you want to manage.
📌 Step 2: Access Page Settings
- Once inside your page, click on “Professional Dashboard” (or “Settings” depending on your version).
- In the left-hand menu, click “Page Access” under Settings.
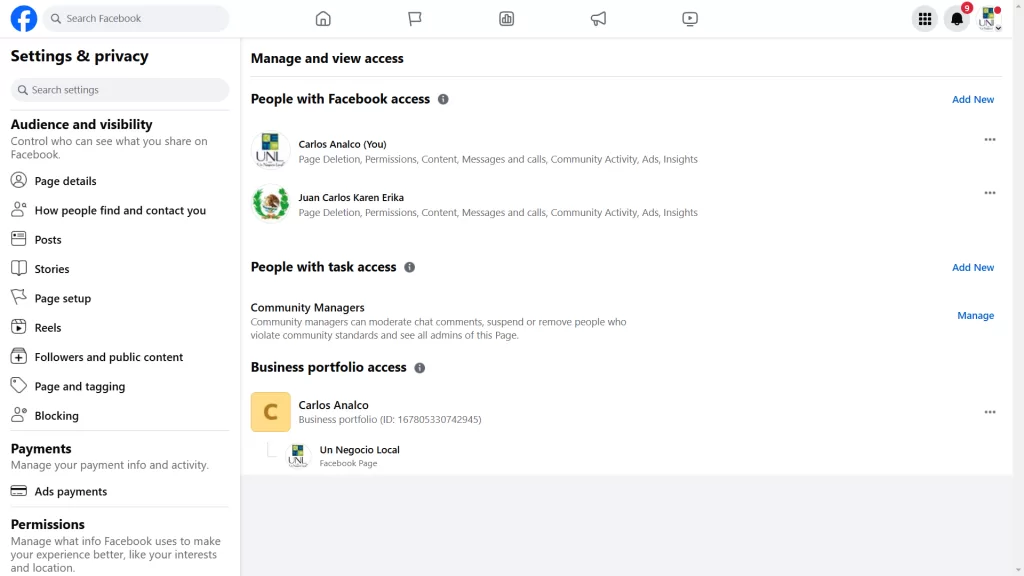
📌 Step 3: View People with Access
- Under the “People with Facebook Access” section, you will see a list of people who can manage or view the page.
📌 Step 4: Manage or Remove Access
- To remove or change someone’s access:
- Click on the person’s name.
- Select “Remove Access” or adjust their permissions.
- Confirm your changes.
📌 Step 5: Add New People
- To add someone to manage the page:
- Click “Add New” in the Page Access section.
- Enter the name or email of the person.
- Choose their permission level (Full Control or Partial Access).
- Click “Give Access” and enter your password to confirm.
✅ Done!
Now you have successfully managed Facebook page access. 🎉 Let me know if you need further details! 🚀